This is a pretty big feat for us, I am a web developer and Annette is a P.A., neither one of us is a handyman, but we now have a big and safe enclosure for our four hens.
This page is here as encouragement to anyone who, like we did in June 2004, is wondering if they would be able to keep hens. You can! We live in Middlesex, just outside London, and even in such a built up metropolitan area, finding and buying supplies isn’t a problem.
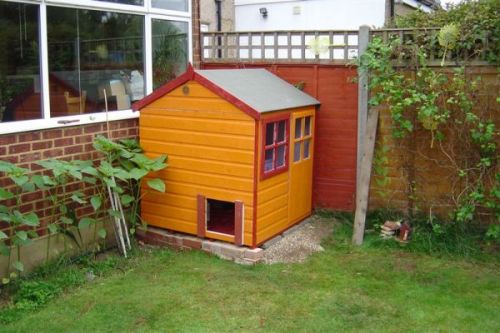
We have a back garden about 30×80 feet, and most of it is grass – just like any other British back garden. After researching many different types and kinds of coop, from the triangular ‘Toblerone’ shaped arks to souped up rabbit hutches, we decided that they were too expensive (upwards of £200, and the ones we were looking at were £400), so we bought a small garden shed from Focus DIY. The shed was just £80 and measures about 5x5x5 feet.
We painted it with outdoor gloss on the outside, to make it look nice and also to weatherproof it. We painted the base (chipboard) in three layers of outdoor gloss to keep it waterproof so soggy poo wouldn’t affect it. The paint tins were about £3 each, and it probably took five tins:
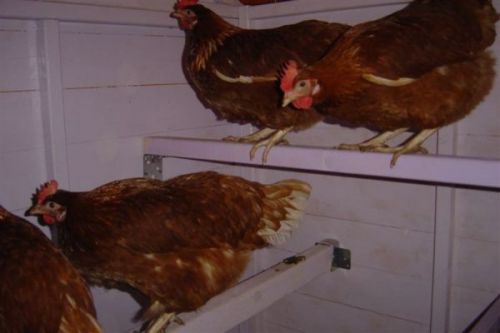
Inside, we got two lengths of timber to make perches, running one from front to back inside the coop, and the other from side to side. The hens used to sit two on each perch, but now all four sleep on the top perch. You can see that we painted the inside a nice girly lavendar colour (again, outdoor gloss – but this time odourfree stuff at about £5 per tin (two of them), and left it outdoors for a week to get rid of any smell.
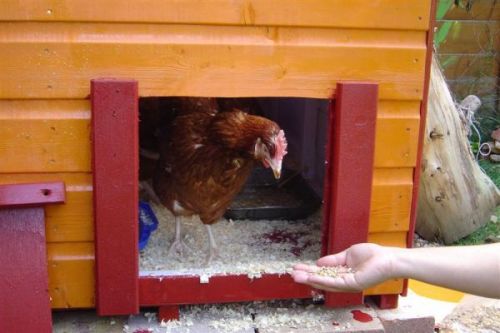
The door we put onto the side of the shed lets them in and out as they please, we open it in the morning and close it after dark, so the hens can get into and out of the coop easily. It’s just a sheet of plywood with a strip of timber along the top to weigh it down.
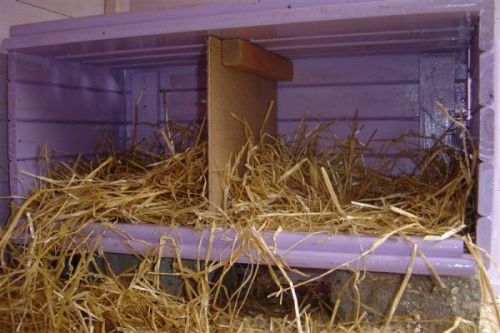
For the nestboxes, we researched them and were surprised to see how basic and simple they had to be. We were replacing our bed at the time, so had lots of timber from that: we cut it down to size and made a double nestbox from the wood we had. We read that a nestbox should be 12x12x12 inches, so that is what they are. Just one large rectangular 24x12x12 box with a sheet of plywood between them. Lined with straw, they love it. Again, painted a girly lavendar.
We got the four hens (bought from a battery farmer) in July and the hens lived here happily -free ranging around the whole garden (enclosed by the usual 6ft fences all around) until about September when the evenings began to get really dark really early. They were taking very early nights (was 9pm, it got to 6pm in late September), and with the early darkness we were worried of an attack from a fox. There are lots of urban foxes here, and in fact we have seen two in our garden since getting the hens: luckily, after dark and after we’d closed their door.
We installed two infrared activated floodlights in the garden to extend the hours of light (no light inside the coop, just outside) – with one 500W halogen lamp pointing at the coop from about 20ft away, and another twin set of spotlights actually on the coop just above their door. The lights were about £10 each from Wickes, and we fitted them to the mains by running an electric cable from the conservatory outside to the lights. The hens love them. When it is dark, the lights come on on their own after sensing the hens moving around. If the lights go out, the hens know how to turn them on: walk up to them.
To protect the hens from predators we decided we needed an enclosure, not just on dark evenings while they are still up (with the floodlights, they have been going to bed about 4 hours after it goes dark – they head off to bed at almost exactly 9pm every night), but also to protect them when we’re not around to close the door to their coop.
We began with an idea for a small rabbit run type enclosure, but thought that the hens make far better use of the garden than we do, so we’d build something Big. We did… so back to the net for some research.
Chicken wire didn’t sound strong enough, a determined fox can bite through it. Chainlink fence (the stuff they use for school tennis courts) seemed good, but it was very expensive.
At the same time, we realised that a basic fence is no good: a fox can jump over it. It needed to be either too tall to climb up, or to have a sturdy roof. We have a conservatory and 6ft fence going right up to it, so a fox could climb the fence, onto the conservatory, and over anything we try to make tall – so a roof it was.
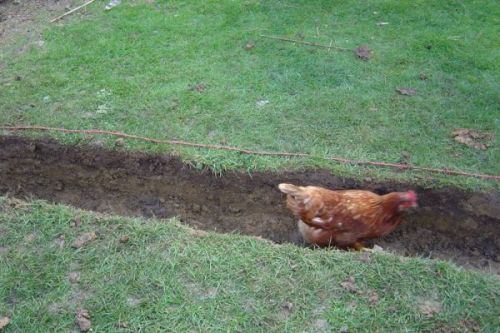
A fox can also dig under a fence, so it had to go underground too. We started by digging a trench into the soil, a foot deep and a foot wide. Our neighbour Channa helped to dig the trenches, and with his enthusiasm and expert tools, he certainly helped to make light work of it.
We found a local supplier after searching Google for ‘agricultural fencing’ who could sell me weldmesh in 25m rolls. Weldmesh is like chickenwire, but much stronger. The wire itself is 2.5mm thick, crisscrossed, and the squares are about 2 inches apart. The weldmesh cost about GBP 70 for a roll. We bought 6ft fence posts from them too, they were £2.75 each. I also bought rails (3.5m long) to join the posts together – they were £3 each.
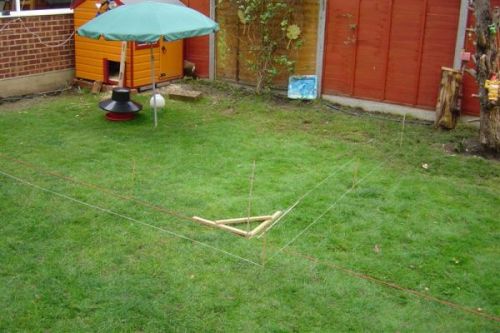
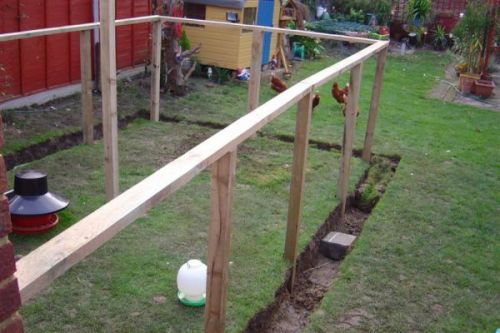
We knocked each fence post into the ground using a Metpost (about £5 each) which was about 2ft long – knocking the Metpost into the ground to be level with the bottom of the trench so that the posts would have 3ft of foundations after the trench got covered back in. We trimmed the posts off by about a foot so that the enclosure would be the same height as the conservatory windowsill.
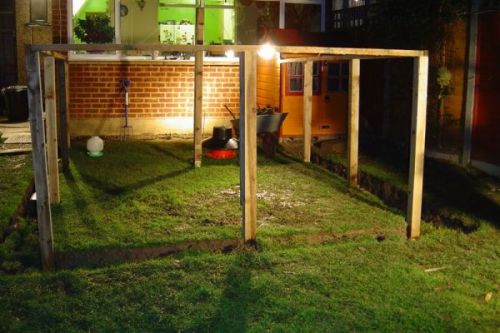
With James’s help, we then unrolled the weldmesh, and cut to to size (with a pair of specially strong wiresnips that I bought from the weldmesh supplier) – the enclosure is 5m long and 3.75m wide. For the sides, we bent it at 90 degrees a foot from the edge, so that the mesh would cover the bottom of the trench. A fox would have to dig a foot deep, and a foot away from the side of the enclosure to get to the edge of the mesh, so he’d need at leasta 2ft x 2ft hole to get in… and that’s not the sort of thing he’s going to be able to do in a night even if he brings his mates!
After the weldmesh was nailed onto the posts and the rails with big U nails, we filled in the trenches with the soil we dug out, and then fixed the roof into place – again, more weldmesh with U nails.
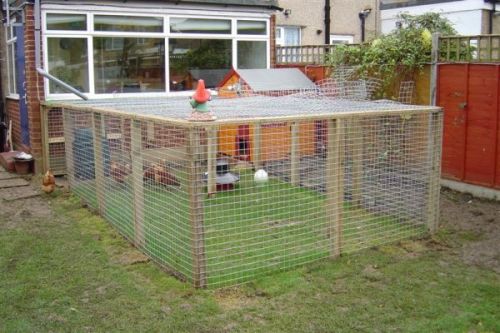
Channa made a door to go between the two posts nearest to the house, with strong hinges and a couple of bolts on it so that it can be bolted locked. As we filled in the trenches, we scattered bits of offcut weldmesh into the bottom to deter any predator who thought he could try and dig down.
Finally we fixed some rope to the door to the coop and ran it through a pulley fixed above the door (and outside and above of the mesh), then ran the rope over the roof of the enclosure to be just above the door to the enclosure, so that we can raise and lower the door with the rope rather than having to climb inside the enclosure. The rope and pulley were about £6 in total from B&Q.
As a finishing touch, we are adding a sheet of corrugated transparent PVC roofing material to one area of the enclosure to provide shelter from rain. The hens are still free ranging around the garden by day, locked into the enclosure at about 4pm when it gets dark. By day, if it rains they have plenty of places to go in the garden to shelter, but in the enclosure they’d be a bit exposed.
If you have got hens, and are thinking about how you can protect them, we can recommend doing this. We are completely not DIYers at all, so if we can manage it, you can too. We will be very happy to hear from you if you need advice or guidance on how to do this from scratch. We’re not experts, but we’re very enthusiastic. Send us an email to annette@foxaway.com and we’ll gladly respond.
If you don’t have hens, get some! As you can see, there’s no one step which is really that hard – and we bought everything from regular DIY chain stores. The weldmesh came from McVeigh Parker in Reading – they delivered us me free and were very helpful in telling us the type of wood (tanalised) and the type of mesh we needed.
We’ve a load more photos in the hen photo album, we’ve taken photos all the way through construction of our Hen Hilton.
Do it for the hens! They LOVE to help with the digging, especially if it is a wet day – they love having a ride on your spade and of course they love pulling out all of the worms from the earth you dig!
What type are your hens? They look not quite like Sandra, our Lohmann Brown hybrid layer. And what are their names?
Sorry, we really don’t know what type of birds they are. We got them in June from a battery farm, which ‘refreshes’ their stock every September – so all their old mates were sent away two months ago (we’ve not told them that though). They all have very different personalities:
We have Chelle – the boldest and bravest hen. She is the first to climb onto a new perch, to dare jump into the wheelbarrow, the first to think of drinking from the fishpond etc. If she could, she’d wear explorer’s boots and have a rucksack with her day’s supplies.
Second in command is Henrietta, she’s very houseproud and will give you a proper telling off if you don’t put any loose straw back into the nest boxes – and does not appreciate noisy construction interrupting her peaceful weekend. She is also Head of Security – it is her job to charge at any visiting pigeons, cats or dogs. Head down, wings up, and run at them all like a kamikaze pilot.
Third in command is Yoko, she’s the naughty rebellious hen who tries to pick on the others if there’s something tasty to eat. She’ll be the first one near the back door when you open it; not to say hello, but to try and barge past you so that she can get indoors. She never knows what to do once she’s in, other than make you edgy.
Bringing up the rear is Penny, very friendly and flirty. She spends most of her time preening herself, so has the nicest feathers. She does an impression of a bird of prey, and will jump onto and sit on my arm if I hold it out. She likes being held more than the others. Always last to try out anything new or to snap up anything tasty.
